HSP : Hot Soup Processor ver3.6 / onion software 1997-2021(c)

HSP3.6 New Feature Highlights
- HSP3.6 Update Overview
- Extension of mes (print) instruction
- About HSP3Dish placement objects
- About layer objects
- About standard sprites
- About callback routines
- About the objcolor instruction
- About the rgbcolor instruction
- Add key obtained by stick instruction
- About character string replacement by strexchange command
- Zip file compression / decompression support
- About the MUCOM88 plugin
- About the hspsw plugin
- About updating the hspinet plugin
- About the 64-bit (x64) version runtime
- Compact (hsp3c) version runtime
- About HSPTV folder material
- Support for English interface
- HSP3Dish screen resizing
- Coordinate transformation by viewcalc instruction
- Image data control by celbitmap command
- About updating the iOS and android version of HSP3Dish
- About updating HGIMG4
Overview of HSP3.6 update
HSP3.6 can be used in the same way as HSP3.5 without being aware of any changes. The outline of the items changed in HSP3.6 is as follows.
- Expansion of standard instructions
-
An option has been added that allows you to modify shadow characters, borders, etc. with the mes and print commands. The objcolor command to specify the color scheme of the placement object and the objlayer command to define the placement object by user definition have been added. There are many other new features such as stricter callback routines and rgbcolor instructions for specifying 24-bit color codes.
In addition, minor updates such as the addition of keys acquired by the stick instruction and the joystick input module have been made.
New runtimes that use Unicode characters as standard, hsp3utf, hsp3_64, etc. have also been updated. We have expanded the functions that are useful not only for games but also for tool production and easy prototyping, while keeping the existing functions. - Expansion of plug-in functions
-
Newly added plugin "hspsw" (Steam platform integration API), "hspmucom" (FM sound source music playback plug-in by MML description), "ZLibWrap.dll" (compression and decompression of zip file), etc. It comes with advanced enhancements and is ready to go.
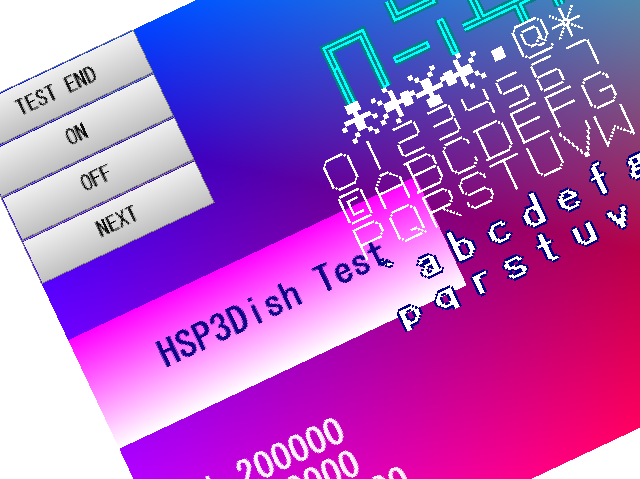
- Expanded functions of HSP3Dish
-
Various functions of HSP3Dish that support execution on Windows / iOS / android / Linux / html5 (WebGL) have been expanded.
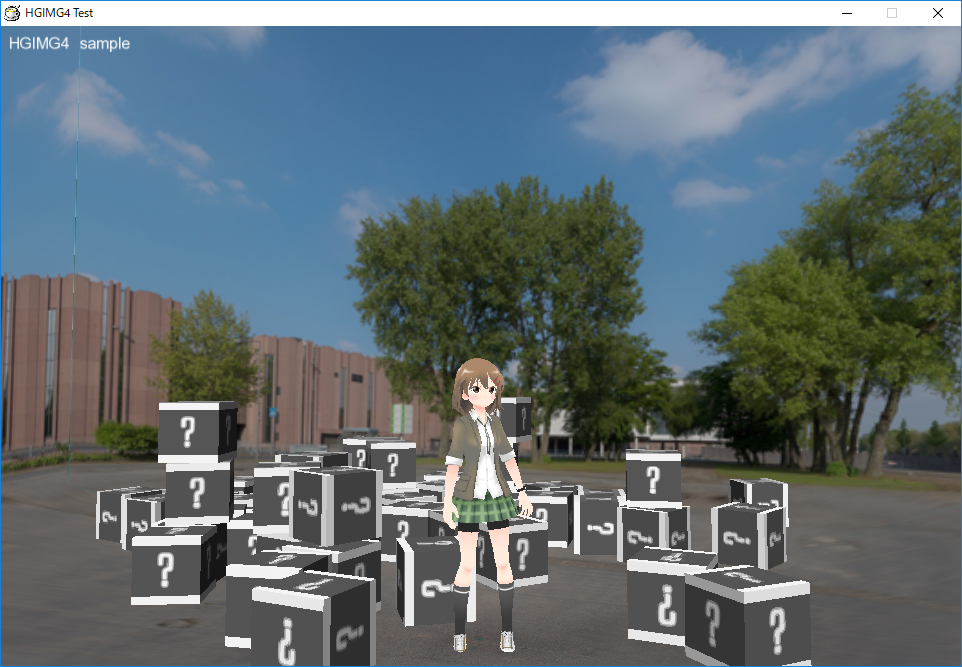
The drawing of character strings has been greatly revised, and all platforms support the display of character strings including Japanese and semi-transparent composition. It also supports checkboxes and input boxes as new placement objects. (Some platforms only) On Windows / Linux platforms, screen, window size change by bgscr instruction, and full screen display are supported. In addition, we are expanding support for new SDKs compatible with the latest terminals, acquisition of various sensor information, network access, and HSPDX compatible sprite drawing functions. Hsp3js, which runs on a web browser, can newly output in WebAssembly format. The speed of drawing HGIM G4 has also been greatly improved, improving its practicality. The HSP3Dish Helper tool, which supports conversion to a wide range of devices, is also now more convenient and convenient to use. - HGIM G4 Plugin Update
-
The HGIMG4 plugin that enables high-level 3D representation has been significantly updated. In addition to improving the stability and speed of the system, the lighting function and post-effect related functions have been enhanced. In addition, detailed usability has been improved, such as restrictions on FBX model conversion and restrictions on duplication.
With the new HGIMG4 tool, you can now see and edit the 3D data after converting the fbx file in more detail. It is possible to check the material (.material) file in detail by GUI.
With new instructions, it is possible to generate free shapes, acquire physical collision information, acquire node hierarchy information, and so on. In the writing function, the types and number of lasts have been expanded, enabling more advanced expressions. We've also added standard module support for post effects. - New HSPTV material
-
Many materials have been expanded in the HSPTV folder as freely usable materials. HSP3 official character "Tamane", professional student collaboration materials, etc. It can be widely used mainly for games. A new sample script is also included, and you can freely use it to create your own original work. "WebDish" , a service that allows you to publish web applications using HSPTV materials, has also been published. increase.
A sample script that allows you to easily try out the new features added in HSP3.6 is included in the "sample / new36" folder. Please try the operation with the new sample by actually executing it.
Extension of mes (print) instruction
The mes (print) instruction has been enhanced to allow character decoration and so on.
The parameters of the mes instruction are as follows.
		mes "strings",sw
"strings": Messages or variables to display
sw (0): Optional
The first parameter of the mes instruction can be a string or a variable name. If you specify a variable name, the contents assigned to the variable are displayed.
The second optional parameter allows you to qualify characters and set behavior.
Value: Macro name: Behavior
			 -----------------------------------------------------
1: mesopt_nocr: No line break at the end
2: mesopt_shadow: Draw shadowed characters
4: mesopt_outline: Draw border characters
8: mesopt_light: Simple drawing of shadows / borders
16: mesopt_gmode: Reflect the gmode setting (HSP3Dish only)
If 2 or mesopt_shadow is specified for the option, the shadowed characters will be drawn. If 4 or mesopt_outline is specified for the option, the bordered characters will be drawn. For shadows and borders, the color specified by the objcolor command is used. Also, the width of the shadow and border can be specified by the 4th parameter of the font instruction.
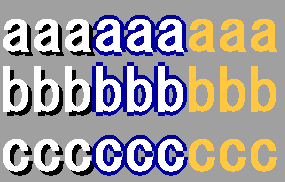
In the above example, the left is the shaded character, the center is the border character, and the right is the normal character.
When 16 or mesopt_gmode is specified as an option, drawing that reflects the settings such as translucency and color addition specified in gmode is performed.
(This option is only valid for HSP3Dish and HGIMG4, ignored by normal HSP3 runtime)
Multiple option values can be specified at the same time by adding them.
If "mesopt_nocr + mesopt_shadow" is specified, the display will be shaded and will not break.
About the placement object of HSP3Dish
In HSP3Dish and HGIM G4 runtime, check boxes, input boxes
Support has been added. (Input box is Windows / Linux only)
You can use chkbox and input instructions in the same way as HSP3. It also supports changing the background color and font set by the objcolor and objmode commands.
These GUI parts are not parts provided by the OS, but are implemented independently by HSP3Dish.
It may differ from the look provided by the OS, but it can provide a unified look across different platforms.
As for the placement objects of HSP3Dish, we plan to expand the same parts as HSP3 in the future.
About layer objects
Layer objects are newly provided user-defined placement objects. By registering a subroutine that draws on the screen in advance, drawing can be executed at the specified timing (layer).
			layerobj p1,p2,p3,*label,p4
p1, p2; XY size of layer object (in dots)
p3 (0): Layer ID
* label: Layer object processing subroutine
p4 = 0 to (0): Option value

 example :
				layerobj 320,240,objlayer_normal,*laysub,100
				stop
			*laysub
				return
Layer objects have no function on their own.
A specific area on the screen is managed as a layer object, and the user's program (callback routine) is called at each drawing timing.
There are various ways to use it, but you can manage only the drawing part independently with modules that will be added later.
In addition, parameters can be received with the objprm instruction, and it is also possible to set or create your own placement object.
For more information on layer objects, see the Layer Objects section of the programming manual.
About standard sprites
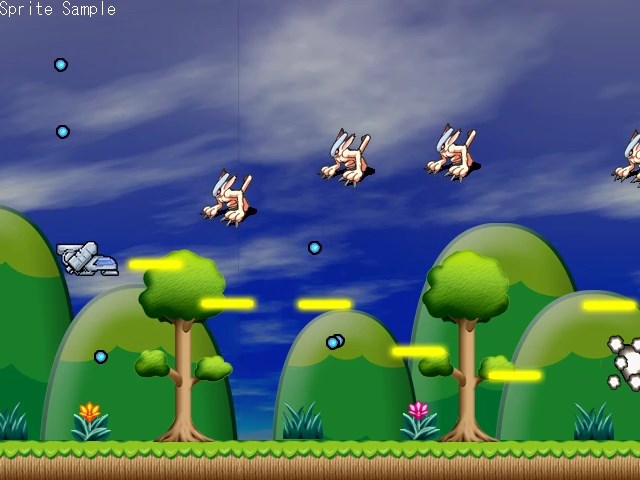
HSP3Dish and HGIMG4 runtimes now support easy-to-use standard sprites .
The standard sprite instructions are compatible with the instructions added as the hspdx plugin, making it easy to handle 2D drawing.
There were several ways to use sprites (rectangular images) when drawing in 2D with HSP3.
・ HSPDX plug-in
・ HGIMG / HGIM GX plug-in
・ HGIM G3 plug-in
・ HGIM G4 plug-in
・ Mod_sprite module
Among them, the plug-ins up to HSPDX, HGIMG, and HGIMGX are from the HSP2 era, and development has already been completed.
It is difficult to operate with the current OS and environment.
The HGIMG3 / HGIMG4 plug-in has 3D functionality as well as a highly functional 2D sprite.
It also has functions, but instead of managing all coordinates with real numbers and having many functions
There was a lot of content to learn and it was difficult to handle easily.
This time, the HSPDX plug-in that has the longest history and has been used by many users
Based on the commands, we have expanded the easy and easy-to-use 2D-only sprite commands.
Sprites can be displayed with simple commands, and sprite images can be freely registered.
It is equipped with a flexible system. Also, sprite callbacks, map drawing, etc.
A unique mechanism has also been introduced, making it more convenient than the original HSPDX plugin.
Coordinates are also managed by integers, making it easy to handle in 2D games and UI displays.
Of course, you can also use the conventional plug-in for autonomous movement by event list and cooperation with 3D.
Standard sprites work on all platforms supported by HSP3Dish and HGIM G4.
The drawing speed is superior to the standard HSP3 runtime, and in scenes where speed is required such as drawing games.
It should be the best choice.
For more information on standard sprites, see Standard Sprite Programming Guide .
About callback routines
A generic term for interrupts, modular variable constructors, destructors, etc. that have occurred in HSP3 until now.
It is defined as a "callback routine" and is managed more strictly than before.
When calling the callback routine, the processing must be terminated immediately by the return instruction in a limited situation.
Labels or user-defined instructions that are called in the following situations are treated as callback routines.
-When executing the cleanup instruction defined by the #deffunc instruction
-When executing modular variable constructors and destructors
-User interrupt by placement object (objlayer)
-Sprite display interrupt by es_setgosub instruction (HSP3Dish)
Callback routines allow you to write instructions just like regular subroutines,
Wait, await, stop instructions, etc. cannot be waited for or stopped.
If there are instructions that cannot be used during the execution of the callback routine,
I get the error 42 (instruction not available in the callback).
For more information on callback routines, see the Callback Routines section of the programming manual.
About the objcolor command
A new objcolor instruction has been added to specify the color scheme of the placement object.
objcolor p1, p2, p3 Specify the color scheme of the placement object

p1, p2, p3 = 0 to 255 (0): Color code (brightness of R, G, B)
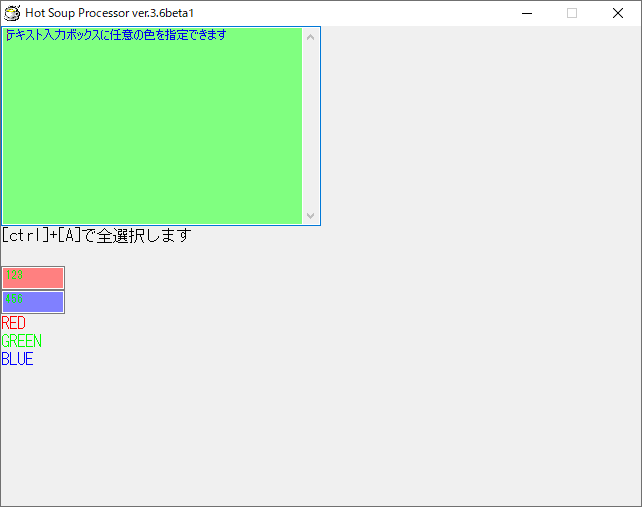
With the objcolor command, you can set the color scheme of the input box, etc.
To enable the color scheme by the objcolor instruction, use the option of the objmode instruction in advance.
You must specify "objmode_usecolor".
objmode objmode_usecolor
The input box by mesbox and input command is specified by the character color specified by rgbcolor and the color command.
The background color is applied.
Also, the text input box by mesbox can be fully selected by pressing [ctrl] + [A] keys.
It has been fixed.
About the rgbcolor command
The rgbcolor instruction for specifying the 24-bit color code has been added.
In the past, each RGB was divided into "color 1, 2, 3" and the parameters were described.
It can be written in the form of "rgb color $ 010203".
It is a specification method that has a high affinity with RGB codes such as "# 112233" used on the Web (html).
The content to be executed is the same for both the color instruction and the rgbcolor instruction. The only difference is the way you write the color code.
Add key obtained by stick instruction
A stick command that collectively acquires information on keys used in games, including cursor keys, and new [Z] [X] [C] and [A] [W] [D] [S] keys. Information has been added.
The added information is stored as the following numbers:
| Value (decimal) | Value (hexadecimal) | Key |
| 1 | $ 00001 | Cursor key left (<-) |
| 2 | $ 00002 | On the cursor keys (↑) |
| 4 | $ 0004 | Cursor key right (->) |
| 8 | $ 00008 | Cursor down (↓) |
| 16 | $ 00010 | Spacebar |
| 32 | $ 00020 | Enter key |
| 64 | $ 00040 | Ctrl key |
| 128 | $ 00080 | ESC key |
| 256 | $ 00100 | Left mouse button |
| 512 | $ 002.0 | Right mouse button |
| 1024 | $ 004000 | TAB key |
| 2048 | $ 000080 | [Z] key |
| 4096 | $ 01000 | [X] key |
| 8192 | $ 02000 | [C] key |
| 16384 | $ 04000 | [A] key |
| 32768 | $ 08000 | [W] key |
| 65536 | $ 10000 | [D] key |
| 131072 | $ 20000 | [S] key |
About character string replacement by strexchange command
The newly added strexchange instruction has a function to replace all the character string data contained in the script at once.
This makes it easier to translate the strings used in the script into another language, replace messages depending on the version, and so on.
String replacement is achieved in three steps.
- Creating string data
- Creation of replacement string data
- Replacement from script
Edit the strex_test2.strmap file with a text editor, etc., and rewrite the character string that needs to be replaced from this file. For example, you can replace the string "*** Hello ***" with "*** Hello ***". It doesn't matter if the length of the string changes. The actually rewritten data "strex_test2en.strmap" is also included in the sample folder.
Finally, in the strex_test2.hsp script, replace your own string. By specifying the "strex_test2en.strmap" file, which is the edited character string with the strexchange command, all the character strings in the script are automatically replaced.
strexchange "strex_test2en.strmap"
This allows you to replace it with something else without modifying the string in the script. It is also possible to replace with multiple languages by preparing multiple files for replacement.
If you want to revert to the string in the script without applying the string replacement,
strexchange ""
Please specify an empty string as in.
The replacement string data file contains a number (hash code) that indicates the original string. This code is matched with the character string in the script to replace it.
Therefore, please note that the same string will be grouped as the same hash.
Also, since the target is the character string in the script, it does not apply when reading an external text file or generating a character string from the character code.
It is very useful for translation and customization in various situations. Please use all means.
About zip file compression / decompression support
Added support for zip file compression and decompression using the ZLibWrap.dll library.
It is possible to compress and decompress files from a script with two simple instructions.
#include "zipfile.as"
You can use the following instructions by writing. (The ZLibWrap.dll file is required for execution.)
	ZipCompress "srcfiles", "zipfile"

Files specified in "srcfiles" (wildcards can be used)
Compress and save to the file specified by "zipfile".

	ZipExtract "zipfile", "path"

Decompress the compressed file specified by "zipfile" to the folder specified by "path".
For details, refer to each instruction help and sample.
About the MUCOM88 plug-in
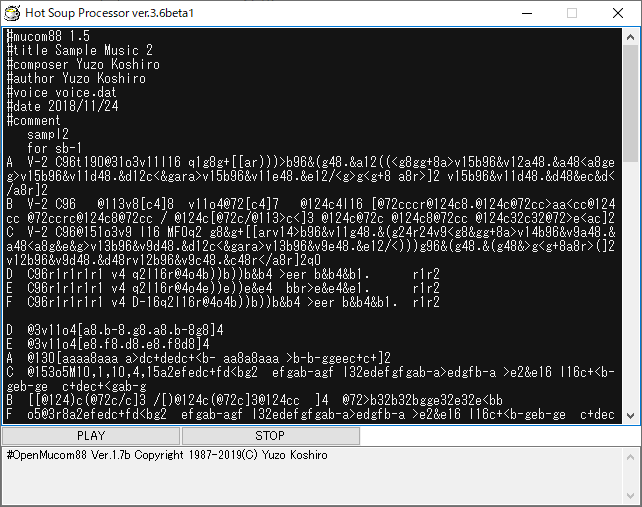
In HSP3.6, the MUCOM 88 plug-in that supports FM sound source playback by MML description is included as standard.
MUCOM 88 Windows that reproduces the FM sound source driver that was operating on NEC's PC-8801 series
You can control it.
From simple music playback to MML interpretation from scripting languages by using the MUCOM88 plug-in
You can control a wide range.
A total of 11 channels of FM sound source (OPNA) 6 sounds + PSG sound source (3 voices) + rhythm sound source + PCM sound source can be described in MML language.
For Windows sound playback processing, use DirectSound of DirectX 8 or later, and in the environment of Windows XP or later,
It can be operated without any additional components.
For details on the MUCOM88 plug-in, refer to the attached manual (docs / hspmucom.txt) for instruction help,
See samples (samples / mucom88).
HSPMUCOM is published as part of the Open MUCOM88 project.
See below for the Open MUCOM88 project.
	Open MUCOM88
		https://onitama.tv/mucom88/
MUCOM 88 Windows tools and sample MML that run on Windows are available.
HSPMUCOM.DLL and source code are freely introduced as long as they are free (non-profit).
It can be duplicated and redistributed. In that case, be sure to document
Be sure to include the license notation as well.
- Portable Z80 emulation Author Yasuo Kuwahara
http://www.geocities.jp/kwhr0/ - fmgen author cisc
http://www.retropc.net/cisc/ - MUCOM88 Author Yuzo Koshiro
https://twitter.com/yuzokoshiro - HSPMUCOM Author Onitama (ONION software)
https://www.onionsoft.net/
About the hspsw plugin
HSP3.6 comes standard with the hspsw plugin for calling APIs for the Steam platform.
On the app distributed on the Steam platform that downloads and sells PC games and PC software,
It can support features such as rankings, achievements (trophy), and reading and writing status.
For details on the hspsw plugin, refer to the attached manual (doclib / hspsw.txt) and samples (samples / hspsw).
please refer to.
HSPSW Plugin Manual
		doclib/hspsw.txt
About updating the hspinet plugin
In the hspinet plugin http / https request Netrequest_put and netrequest_delete corresponding to PUT / DELETE method Instructions have been added. This makes it possible to use more Web APIs.
hspinet plugin manual
		doclib/hspinet.txt
About the 64-bit (x64) version runtime
The HSP3 standard runtime (hsp3_64.exe) that runs as a 64-bit (x64) app is Changed to work on a unicode (UTF-8) character basis by default. If you want to use it, specify the following line at the beginning of the script.
#include "hsp3_64.as"
The operation specifications are the same as the HSP3UTF (UTF-8) version runtime. The 64-bit (x64) runtime only works on 64-bit versions of Windows (Windows 7 and above).
Compact (hsp3c) version runtime
Compact runtime (hsp3c) up to HSP3.51 starts with standard HSP3
Some functions were removed, but the functions have not changed since HSP3.6.
The big difference from the standard runtime is the single thread library with the old compiler
It was built using it, which reduces file size and memory usage.
Execution efficiency may decrease in a new OS or CPU environment.
The standard runtime is built in the latest compiler environment and is efficient in many environments.
Optimized to work.
We recommend using the standard runtime unless you have a specific reason to do so.
However, while the standard runtime supports Windows XP and later behavior,
The compact runtime supports Windows 98 and later operations.
When using the compact runtime, specify the following line at the beginning of the script.
#include "hsp3c.as"
Along with this, the multi-threaded runtime (hsp3mt) that was prepared up to HSP3.51 is no longer included. Users who used hsp3mt should continue to use the standard HSP3 runtime.
About HSPTV folder material
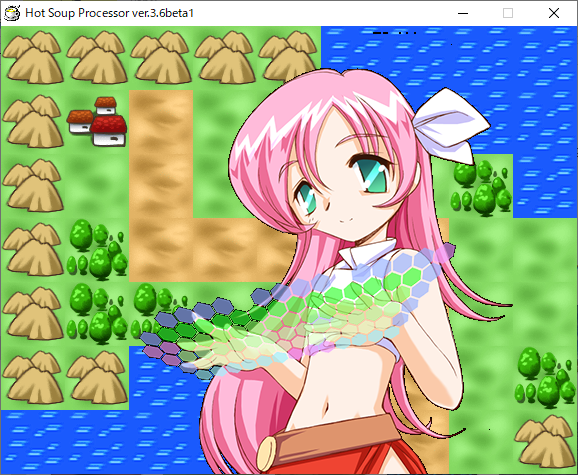
As an image and sound data file that can be freely used when presenting a work The HSPTV folder material has been greatly expanded. With a simple license, it can be used for works other than HSP. You can also freely refer to the "WebDish service", which allows you to publish HSP scripts on the Web. I hope that many works will be created by utilizing "HSPTV folder material" and "WebDish material".
HSP3.6 WebDish material data
		https://dev.onionsoft.net/seed/webdish_res.html
WebDish service
		https://dev.onionsoft.net/seed/webdish.html
Support for English interface
Error messages when running HSP runtime on Windows and Linux are displayed by switching between Japanese and English based on the character code of the OS environment.
In addition, an English version of the script editor is newly included in the HSP installation folder.
By starting "hsed3_en.exe", the menu and other interfaces will be in English.
There is no change in the function of the HSP3 main unit, but if you want to use it in the English version environment, please try it.
We will continue to prepare for the internationalization of the HSP development environment.
About screen resizing of HSP3 Dish
Supports dynamic change of screen (window) size in Windows / Linux version of HSP3Dish and HGIMG4.
Previously, the size was fixed at startup according to the size recorded in the hsp3dish.ini file,
We have received requests from many people to change the size and support full screen, and have corrected it.
From HSP3.6, the screen (window) size can be changed by the screen command and bgscr command.
	screen p1,p2,p3,p4,p5,p6

p1 = 0 to (0): Window ID
p2 = 1 to (640): Screen size to be initialized X (1 dot unit)
p3 = 1 to (480): Screen size Y to initialize (1 dot unit)
p4 = 0 to 1 (0): Screen mode to initialize
p5 = 0 to (-1): Window layout X (1 dot unit)
p6 = 0 to (-1): Window layout Y (1 dot unit)
The window ID of p1 is 0 only. The following values can be specified for the initialization mode of p4.
+4 (screen_fixedsize): Fixed size window
+8 (screen_tool): Tool window
+16 (screen_frame): Window with deep edges
+256: Full screen
If you specify 256 for p4, it will be initialized as full screen with the specified resolution.
Also note that when resizing the screen, unlike the normal runtime, all image buffers loaded up to that point will be lost.
Coordinate transformation by viewcalc command
In HSP3Dish and HGIMG4, the viewcalc instruction that sets the coordinate transformation at the time of drawing has been added.
The viewcalc instruction is a powerful function that allows you to apply arbitrary calculations to the X and Y coordinates when drawing in 2D.
You can scale, move, rotate, etc. the entire rendered display.
	viewcalc p1,p2,p3,p4,p5

p1 (0): Setting mode
p2 (0.0): Parameter 1 (real number)
p3 (0.0): Parameter 2 (real number)
p4 (0.0): Parameter 3 (real number)
p5 (0.0): Parameter 4 (real number)
There are several types of setting modes specified by p1, and various conversions can be performed.
Macro name value Content
	-----------------------------------------------------
vptype_off 0 No coordinate transformation (default)
vptype_translate 1 Specify movement parameters
vptype_rotate 2 Specify rotation parameter
vptype_scale 3 Specify scale parameter
vptype_3dmatrix 4 Coordinate transformation by 4 × 4 matrix
vptype_2d 5 Set 2D coordinate transformation
vptype_3d 6 Set 3D coordinate transformation
vptype_2d is in a mode to apply basic 2D coordinate transformations. Parameters 1 to 3 allow you to set the X and Y scales (magnification) and rotation angle (in radians).
viewcalc vptype_2d, 2.0, 2.0, 0.0
If you specify as, it will be displayed on a double scale in the X and Y directions, and the angle will be 0.
You can specify various other parameters. See the viewcalc instruction help for more information.
Image data control by celbitmap command
In HSP3Dish and HGIMG4, the celbitmap instruction for handling the contents of the variable buffer as image data has been added.
Until now, HSP3Dish could not directly access the image data in dot units, but this command makes it possible to read and write the contents of the memory as image data.
	celbitmap p1,var,p2

p1 (0): Window ID
var: Array variable to replace the image
p2 (0): Operation option
When using the celbitmap instruction, it is necessary to initialize the offscreen buffer created by the buffer instruction in advance and the variable buffer to replace it.
Create an offscreen buffer by specifying the screen_offscreen option with the buffer instruction.
buffer 2,256,256,screen_offscreen
Then create a variable buffer to replace the buffer.
Initialize the one-dimensional array with the dim command and create it. The size to be created is X size x Y size of the offscreen buffer.
dim bitmap, 256*256
Now you are ready to use the celbitmap instruction.
By specifying the ID of the offscreen buffer and the array variable with the celbitmap command, the contents of the variable buffer are applied as they are as an image.
The variable buffer is 1 dot per element. One dot is RGB format data in which 32-bit elements are stored in 8-bit units for each of R, G, B, and A. (Please note that the order of RGB has changed between 3.6β2 version and 3.6β3 version.)
For example, if you specify "$ ff204080" (hexadecimal), A = $ ff (255), B = $ 20 (32), G = $ 40 (64), R = $ 80 (128). (Decimal numbers in parentheses)
Please note that replacing image data is a costly process and may reduce the frame rate when replacing large size images.
The p2 parameter allows you to specify the replacement format and behavior.
Value macro behavior
	---------------------------------------------------------
0 Hold data in celbitmap_rgb $ aabbggrr format
1 Hold data in celbitmap_bgr $ aarrggbb format
16 celbitmap_capture Read the contents of the drawing screen into a variable
Normally, the format of celbitmap_rgb that conforms to the OpenGL standard is used. If celbitmap_bgr is specified as an option, the ARGB sequence will be in accordance with the DirectX standard.
When celbitmap_capture is specified, the data on the drawing destination screen is read into the array variable. (The read size will be the size of the offscreen buffer)
* The celbitmap_capture option is an experimental implementation. Currently, it can be used only on Windows (excluding DirectX version HGIMG4) and Linux version.
About updating iOS and android version of HSP3 Dish
The iOS and android versions of HSP3Dish are compatible with their new SDKs.
iOS version: For XCode 10 or later iOS14, 64bit compatible
android version: Android SDK 10 (API 29), 64bit compatible,
SDK r25, NDK r12 or later, AdMob (Google Firebase) compatible
Both iOS and android versions support 64-bit binary output. Since the SDK and development environment of the corresponding version are required, See the manual for more information.
HSP3Dish Manual Index
		hsp3dish.htm
Existing projects may not build properly, so We recommend that you recreate the existing project.
About updating HGIMG4
HSP3.6 is a major modification from the previous HGIMG4. We have reviewed various functions to make it more powerful and easier to use. Designed to work upwards compatible with previous versions, Since some functions may behave differently, please use the script created in the past. Please be careful when operating it. For details on how to use it, refer to the HGIM G4 Programming Guide.
HGIM G4 Programming Guide
		doclib/hgimg4.html
The outline of the added and changed items is as follows.
- FBX model conversion update
A major fix to the process that could cause an error when converting a complex FBX model. Models containing bones can be converted correctly, including animations. A new HGIMG4 Unity integration guide is included. Explains how to convert model data and animation in cooperation with the 3D tool "Unity".HGIMG4 Unity Cooperation Guide doclib/hgimg4_unity.html
The "Professional Student Demo" (sample / pronama3d) created using this collaboration is also available. It is included as a sample.
- System stabilization and error log acquisition
Enhanced log output to know the cause when an error occurs. When loading a 3D model, applying animation, compiling shaders, etc. Detailed errors are output as a log. Also, a switch for turning log output on / off is set in the sysreq (system request) item. Has been added.setreq SYSREQ_LOGWRITE,0; Suppress log output
- Getang, add getangr instruction
The getang and getangr instructions have been added to get the attitude information of the object at the rotation angle of XYZ. It is easier to handle than the rotation information in quaternion format. In addition, commands with different rotation orders are given to each of the setang, event_ang, and event_setang commands that specify the rotation angle. I am preparing.setang (setting the rotation angle by the order of X-> Y-> Z) setangy (setting the rotation angle by the order of Y-> X-> Z) setangz (setting the rotation angle by the order of Z-> Y-> X) event_ang (event change of rotation angle according to the order of X-> Y-> Z) event_angy (event change of rotation angle according to the order of Y-> X-> Z) event_angz (Event change of rotation angle according to the order of Z-> Y-> X) event_setang (Event setting of rotation angle according to the order of X-> Y-> Z) event_setangy (event setting of rotation angle according to the order of Y-> X-> Z) event_setangz (Event setting of rotation angle according to the order of Z-> Y-> X)
- Addition of gpscrmat instruction
The gpscrmat instruction has been added. This will reference the offscreen texture buffer Generate material. Rendered offscreen by generating your own material Images Images can be reused as textures from shaders. By reusing the contents drawn on the off-screen as a texture, detailed specular reflection (reflection), It can be applied to the generation of shadows.
A mod_posteffect module that makes it easy to use post effects using this function is provided as standard. This allows you to apply effects such as color adjustment, blurring, glowing, and contour extraction to the entire screen.
(* Off-screen texture buffer is only supported on Windows, Linux and android platforms)
- Added parallel projection camera option to gpcamera instruction
A camera type parameter option has been added to the gpcamera instruction to generate a camera. By specifying 1 for the camera type value, it is possible to set a camera that performs parallel projection (Orthographic).
- Cubemap texture support
GPOBJ_MATOPT_CUBEMAP has been added to the material's optional parameters. Cubemaps can be used as environmental maps, skyboxes, etc. in a special format that summarizes images in six directions. You can use it. (For the cubemap image, use one .PNG format in which 6 images of + X, -X, + Y, -Y, + Z, -Z broadcast are connected vertically. is needed. )
- Rendering group settings for each camera
A setobjrender instruction has been added to set the rendering group for an object. This allows you to give objects a setting to show / hide for each camera. You can also set a lighting group to reflect the light for each object. You can control it.setobjrender id,rendergroup,lightgroup id (0): Object ID rendergroup (1): Rendering group value lightgroup (1): Lighting group value
If the render group value is the same as the render group value of the camera or light, It will be valid. Normally, group 1 is set for both objects and cameras. Display from a specific camera only It can be used when you want to disable the display. Lighting group values enable / disable for specific lights. If it is different from the lighting group value of the light, the light will be disabled. Each group value is from 1,2,4,8,16,32,64,128,256,512,1024,2048,4096,8192,16384,32768 Any combination of bits can be specified.
- TTF font support
We reviewed the display method of character strings (fonts) and supported Japanese display with TTF fonts on all platforms. In previous versions, the res / font.gpb file was required, but this file is no longer needed. However, depending on the platform, a separate font file may be required.
Please note that the supported font types, qualities, etc. may vary depending on the platform.Platform Character code Font file Windows SJIS Not required Linux / RaspberryPi UTF-8 ipaexg.ttf file required html5 (Emscripten) UTF-8 unnecessary android UTF-8 unnecessary iOS UTF-8 unnecessary
Similar to HSP3Dish, TTF font display draws a font character string on a texture and caches it. This method has the advantage of using free fonts and characters, but it is CPU- and memory-intensive when displaying different content over a wide area. This is a big difference from before, because displaying the values and contents that change every frame increases the load for each frame. It also increases the load when the font size is large or when a large amount of text is displayed on the screen.
If you do not need to draw in TTF font, you can switch the display in the conventional drawing format by system request.setreq SYSREQ_USEGPBFONT,1
As shown above, you can switch to the traditional font display by setting SYSREQ_USEGPBFONT to 1 in the system request. (You need to prepare the "res / font.gpb" file)
Font drawing can be switched at any time by system request.
- Expansion of lighting function
Up to 10 parallel light sources (directional lights), point light sources (point lights), and spot lights can be placed. You can set any of the affected objects, and you can also control the light parameters.
For more information, see Instructions such as gplight and gpuselight. The sample / hgimg4 folder contains light_test1.hsp to light_test5.hsp as light setting samples, so please check the operation as well.
- Acquisition of various information
The gppcontact and gppinfo commands have been prepared to acquire detailed information such as coordinates and directions when objects with physical behavior set collide. We've also added a gppraytest command to find out which objects touch any vector (two points in space).
A new gpnodeinfo instruction has been added that allows you to traverse each hierarchy of a complex 3D model with hierarchies. You can get the coordinates and rotation information in any node hierarchy, and you can retrieve all the hierarchy information.
- Free shape generation
A function has been added to create polygon surface information from a script and treat it as an object. By combining the gpmeshclear, gpmeshadd, and gpmeshpolygon instructions, you can compose a triangular or quadrilateral face and set the X, Y, Z coordinates, normal vector, texture UV coordinates, etc. of each.
- Built-in 2D drawing shader
In the previous version, the shader file for 2D drawing in "res / shaders" was read and used at startup, but The new version has a built-in shader for 2D and no longer requires external files. If you use only 2D drawing, you do not need to prepare the file in "res / shaders". When drawing in 3D, an external shader file is still required.
- Update of HGIM G4 tool
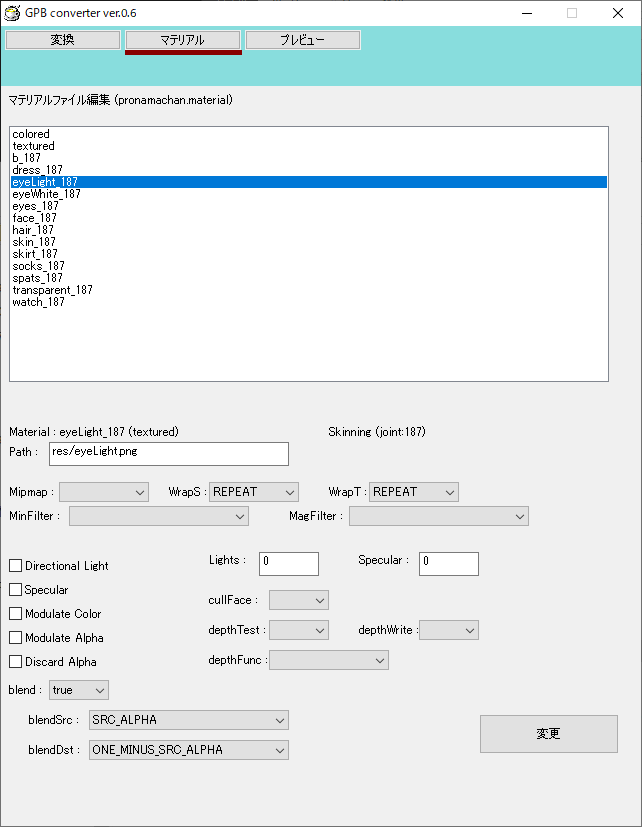
A new feature has been added to the HGIMG4 tool (gpbconv.exe) that can be launched from the script editor.
We have added a material (.material) GUI editor that allows you to check and edit the 3D data after converting the fbx file in more detail. In addition to changing detailed drawing settings for each material, you can check the texture file and edit the lighting settings later.